Monday, November 15, 2010

Temporary Home

My husband and I moved from the Dallas/Ft. Worth area to Austin, Texas in June/July of this year.  Our house in DFW was still on the market when we moved so we had to rent.  We couldn’t get anything less than a year lease so I resigned myself to living in the rental for a year. 

Calico Corners


I unpacked all my china (7 or 8 sets) along with lots of other things.  Since then, our house sold (praise God) and we began looking at new houses.  Well, with the housing market being what it is, we really wanted to take advantage of the low prices and incentives and build sooner than a year.  Our builder was able to work with us and our landlord to get us an early release on our lease.

So, now we’re building our new home!


Country Living (I think)

They poured the slab on Friday a week ago and began framing on Tuesday of last week.  We go over in the evenings and walk around our house and take pictures.  I’m so excited.

My future new home

This will be the fourth house I’ve owned and also my fourth new house.  It seems I always build a new house.  Just because I’m familiar with this process doesn’t mean I don’t still get all excited with each new home.


Back in September I got to go to the design center and pick out tile and carpet for the floors, granite for the kitchen counters and tile for the backsplash (I picked subway tile), kitchen and bath cabinets and wall colors.  I have so many great ideas for decorating the place.  I’ve begun a notebook and file of ideas for each room including wall colors, window coverings, furniture, pictures for the walls and decorative elements to make the place into ours.


Sarah Richardson Design
The pictures interspersed in this post are some of my inspiration photos that I’m using to help me with the design of the place. 

Elizabeth at Blue Clear Sky did a blog on Ralph Lauren and his style here.  This is her inspiration for their guest bedroom. 

Ralph Lauren via Blue Clear Sky


I can’t wait to see how it comes out.  I love the blues and browns and tans along with the natural elements such as leather, wicker and wood and the chunky pottery and white dishes.  I also love how Ralph uses denim, ticking, leather and florals together. 

My family room will have a red gingham denim sofa and two mission style leather recliners.  I was trying to decide whether to add lots of blue and white for a red, white and blue palate or to use red, brown and yellow.  And then I watched Sarah’s House on HGTV online and saw this master bedroom and fell in love with the pillow fabric on the bed.  The designer is Sarah Richardson.


Sarah Richardson Design

I’m thinking of using something like this for the roman shades in my breakfast room and as accent pillows in the family room.  It’s just so happy. 

I found this fabric at Calico Corners online:


Calico Corners

It’s called Wilmington Multi and looks very similar.  I just need to go visit it in person and get a sample and live with it for a few days before making a firm decision.


This is my inspiration for a corner of the family room where my husband and I will have our computers.  I want lots of white cabinetry to hold stuff and some open display space for some of my really neat stuff.

Barclay Butera

I love the natural elements in this picture and hope to use some of the ideas in this picture in a secondary bedroom. 

I’ll keep y’all updated on all the exciting happenings as the house is built.  Until then, my husband and I will live in our temporary home and dream of our new one. 

Cindy

P.S.  Check out Susie Davis's blog for a really great giveaway worth like $275 including a gift card to Pottery Barn and another to Williams Sonoma.

Thursday, November 11, 2010

Kitchen Stool Slipcover Tutorial

The kitchen stool slipcover tutorial from my August 17 post was requested so here goes:

This is the stool that I wanted to slipcover.  I used some left over drop cloth fabric that I already had. 


This crude sketch was what I hoped to accomplish. 


First I made a pattern of the top of the stool.  I added about a ¼ inch all the way around for a hem.  In hindsight, that was not enough because the thickness of the fabric makes the top of the slipcover fit too tightly on the stool.  I should have added ½ inch all the way around.


I cut a circle out of the fabric for the top of the slipcover.


Since I wanted the sides to be about 3 inches long, I cut a 4 inch wide strip to allow for seams.  To determine how long I needed to make the strip, I used geometry.  The circumference of a circle is p d (pi times the diameter).  To make it easier, just measure the finished diameter of the stool, which is the distance across the top of the stool, and multiply it by 3.14.  I used that distance and added about an inch for seams.


I sewed that strip around the edge of the circle and this is what it looked like.


For the ruffle, I wanted about an inch to show but because I was doubling it, it had to be 2 inches plus the seam allowance.  I cut a strip about 3 inches wide.  I folded the strip in half the long way and did a pleated ruffle as I pinned it to the edge.


After I sewed the ruffle to the bottom, I ran a top stitch along the seam to keep the seam from unraveling.


Here is the finished product. 


This was my first foray into slipcovering but it was an easy project.  I hope someday to slipcover one of my sofas but will probably do a chair first.  I have to thank all the wonderful gals in blogland for sharing their slipcover projects and their tutorials. 

Cindy

Tuesday, November 9, 2010

Homemade Jadeite Napkin Holder


I love Jadeite but don’t like the prices of the old stuff.  I have no problem with buying the reproductions since it’s the color I like more than the value of the old pieces.  I don’t even mind a plastic reproduction just to get that color. 

For that reason I decided to paint a plastic napkin holder.  I got mine at Walmart for under $3 but I think I also saw one at the Dollar Store and you know how much it would be there.

I decided to use acrylic craft paint knowing that it can chip off easily but my napkin holder won’t need to be washed often.  (I don’t have any children at home.)  When it does need to be washed, I can just paint it again.

Here is the napkin holder with just the bottom painted:


I painted the underside so that the part that shows is the shiny plastic with the paint showing through.  You can see how I painted the inside of the sides; again so that the shiny plastic is outside with the paint showing through.


Here it is all done with some of my collection of reproduction jadeite.


What do you think?  What color would you paint yours?

Cindy

I'm linking to:

My Uncommon Slice of Suburbia Tuesday's Treasures
Coastal Charm's Nifty Thrify Tuesday
Freckled Laundry's Air Your Laundry Friday Link Party

Thursday, November 4, 2010

Brass Lamp Redo

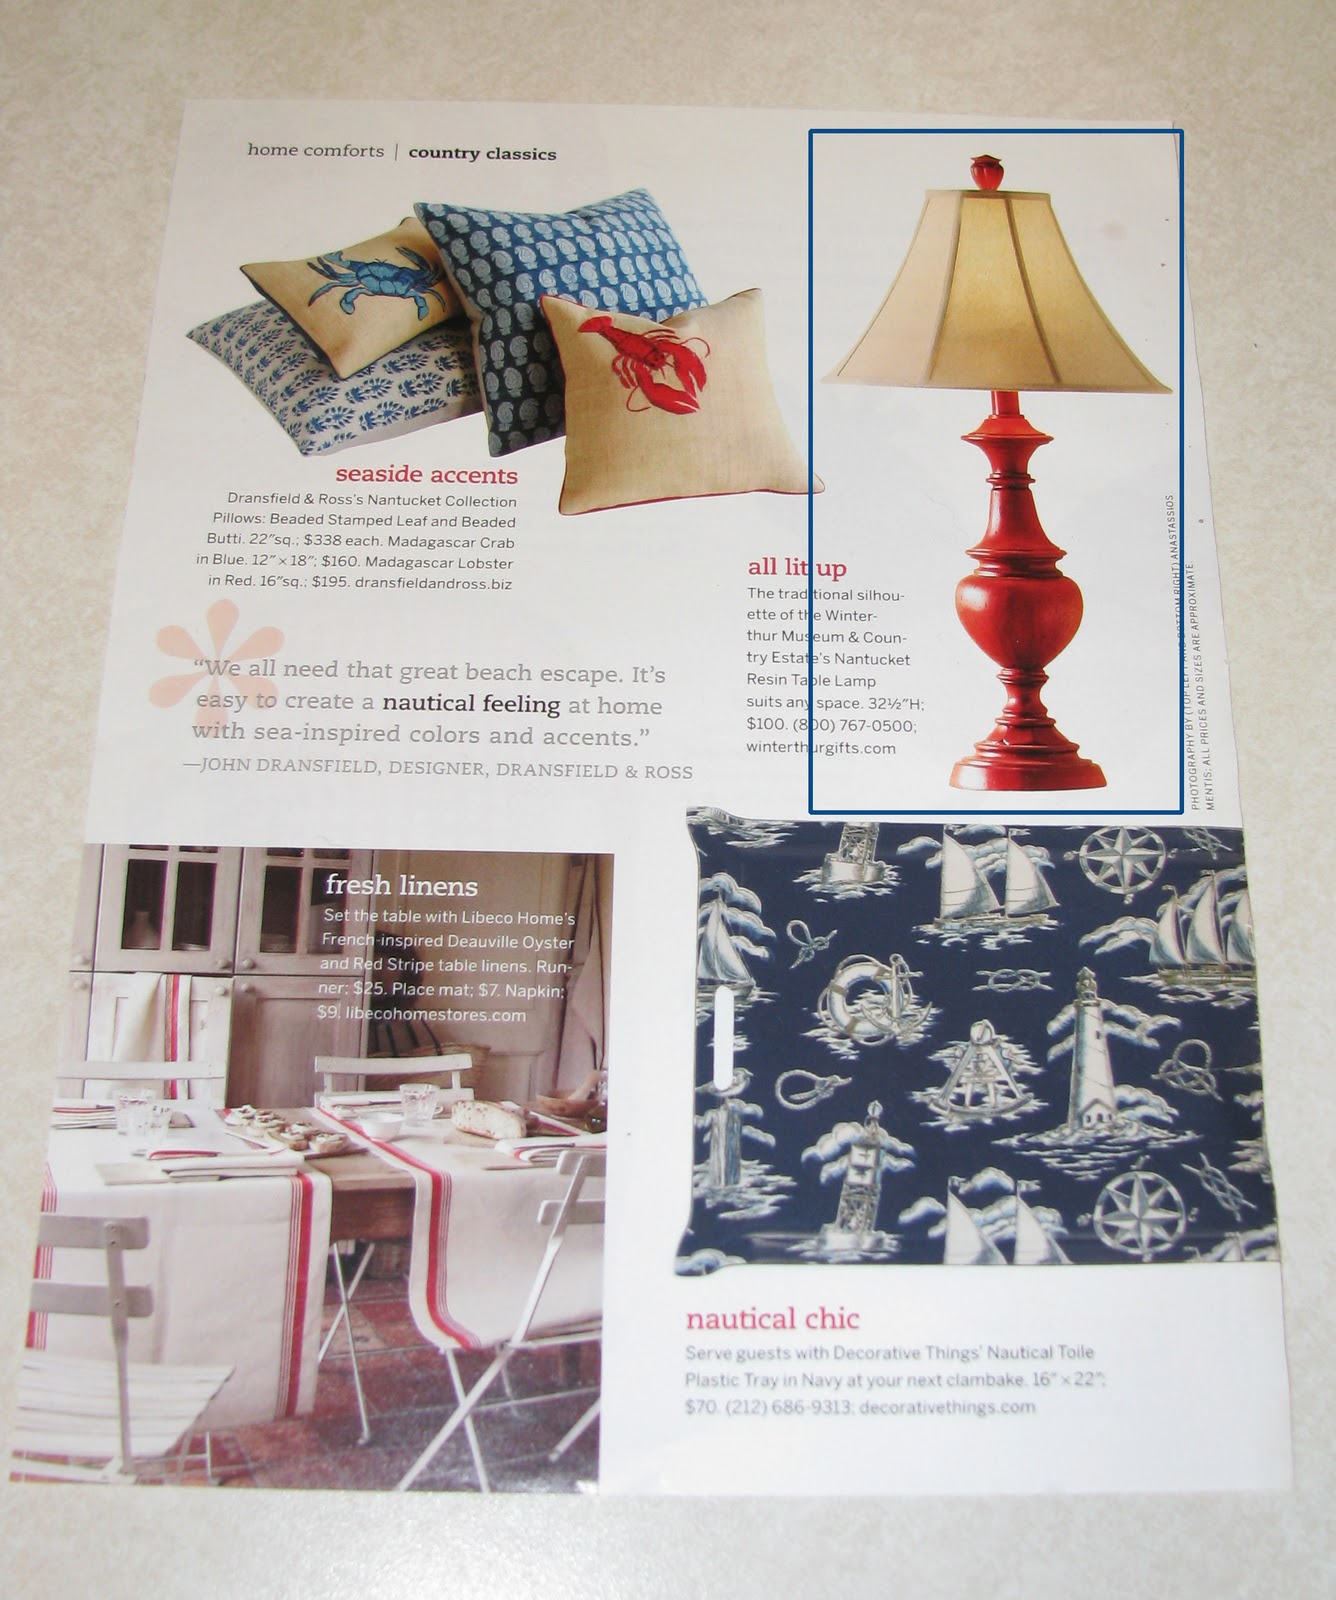
Well, I decided that I really needed to try spray paint on my old brass lamp.  I got married in the mid-80s when brass was really hot and originally had lots of it.  I’ve gotten rid of most of the brass stuff I’d collected through the years but I still had an old brass table lamp.  I saw this picture in a magazine and figured my old brass lamp would be perfect for this transformation:


Of course, I forgot to take a ‘before’ photo but just imagine this primed lamp in brass. 

It was pretty dusty from being stored in the garage since our move in July so first I used TSP to clean it.  The brass actually looked really pretty after being cleaned but TSP took the lacquer finish off so it would have been needing constant polishing.  (I like to sound like I know what I’m talking about, but really, my husband is the expert on finishes of all sorts so he was the one to tell me this.) 

I didn’t use any sand paper but I did use a metal primer, Rustoleum Primer Sealer, for use on metal and all sorts of other finishes.  I gave it one really good coat of primer.  The cap on the primer was black so naturally I thought it would be black . . . but it wasn’t.


After sufficient time for the primer to dry, I coated the lamp with, I think, three coats of Krylon Cherry Red gloss.  I made sure to spray into all the nooks and crannies of the lamp.  I even got up real close to it make sure I didn’t miss anything.  I also sprayed the finial that goes on top of the shade. 

I let it dry overnight then used Minwax dark walnut stain.  As I said before, my husband is the expert on finishes and has lots of different stain colors on hand.  I picked the darkest, non-red wood stain.  I applied it heavily it to the lamp and let it sit for about a minute, more or less.  Then I wiped off the excess while still allowing it to stay heavily in the crevices and lightly on the rest of the piece. 

My husband told me it’ll take about a month for the oil-based stain to dry and cure thoroughly.  In the meantime, I’ll make sure it’s out of the way of traffic.


I’m very pleased that it turned out just as I hoped it would!  And it’s a real close match to the original in the magazine picture, don’t you think?


Thanks for stopping by.

Cindy

I'm linking up to:

Domestically Speaking's Power of Paint Party
Blue Cricket Design's Show and Tell
The Shabby Chic Cottage's Transformation Thursdays
The Shabby Nest's Frugal Friday.

Friday, September 10, 2010

Checkered Floors - Favorite Thing #2

I just love checkered floors in the kitchen.


I really, really want a checkered floor in my kitchen.


My preference would be on point.


But I would take squared up checks.


Did I mention that I really love checkered floors?


My husband and I are looking to buy a new house as in we get to pick the decorator items. We’re on a real tight budget but I’m going to see if we can get two colors of tile in the kitchen. If it’s not too expensive, I want to have it laid on point. But again, I’ll take it squared up if that’s the only way we I can get it.


If I can’t get the tile checkered, I found out that ceramic tile can be painted. I don’t know if that would work well in the kitchen with the moisture and traffic, not to mention the dogs in and out.


Below is my inspiration picture. I want to use brown and cream tiles for the checkers. I want to have it put in the entry way also just like this picture.


What do you think about checkered floors? What colors would you use?