Showing posts with label Coffee Filter Wreath. Show all posts

Tuesday, November 30, 2010

Update on Latest Projects

I blogged about some of my latest projects here and here

My projects included:
  1. An old School Blackboard
  2. 'Fresh Eggs' sign
  3. Small Coffee Filter Wreath
 I finished two coffee filter wreaths; a large one made with brown coffee filters and a small one on which I painted the edges pink.


I finally finished the old school blackboard.


It started it's life as a white board with a yucky oak frame with some kind of shiny, but cracked finish.  I wanted it to look like one that could have hung in an old school classroom so I sanded off the old finish on the oak frame and stained it dark walnut.  Then I painted the board with blackboard paint. 

It's really large, 24" x 36".  I posed BD by it so you can see how really big it is.  He's really big; he weighs 85 lbs.  I'd love to show it hanging somewhere, but we're moving a month from today, so I'm packing and don't want to put any more holes in the walls of the rental.

I have to add as a side note that the Rustoleum blackboard paint is a really cool color before you put any chalk on it.  I might want to have that color mixed up in a semi-gloss for a piece of wood furniture.


Last, is my 'Fresh Eggs' sign.  It's not entirely finished but has to do for now because all projects have been put on hold until after we move.


I still plan to add a small frame of stained wood and do some work to make it look old.  So far it's coming along just as I imagined it.  I plan to hang it over the windows in the breakfast room or over the cabinets in the kitchen in my new house.  I'll show it again after we move.


What have you been working on?

Cindy

My Old School Blackboard was featured 12/3/10 on Facebook at Rustoleums's Paint Ideas

Linking up to:

My Uncommon Slice of Suburbia's Tuesday's Treasures
Photobucket

Domestically Speaking's Power of Paint party
Power of Paint Party

Re-Store Interiors Re-Stored-It Wednesday


Blue Cricket Design's Show and Tell party
Show and tell Green

Coastal Charm's Nifty Thrify Tuesdays
 http://linda-coastalcharm.blogspot.com/

Thursday, November 18, 2010

Project Update

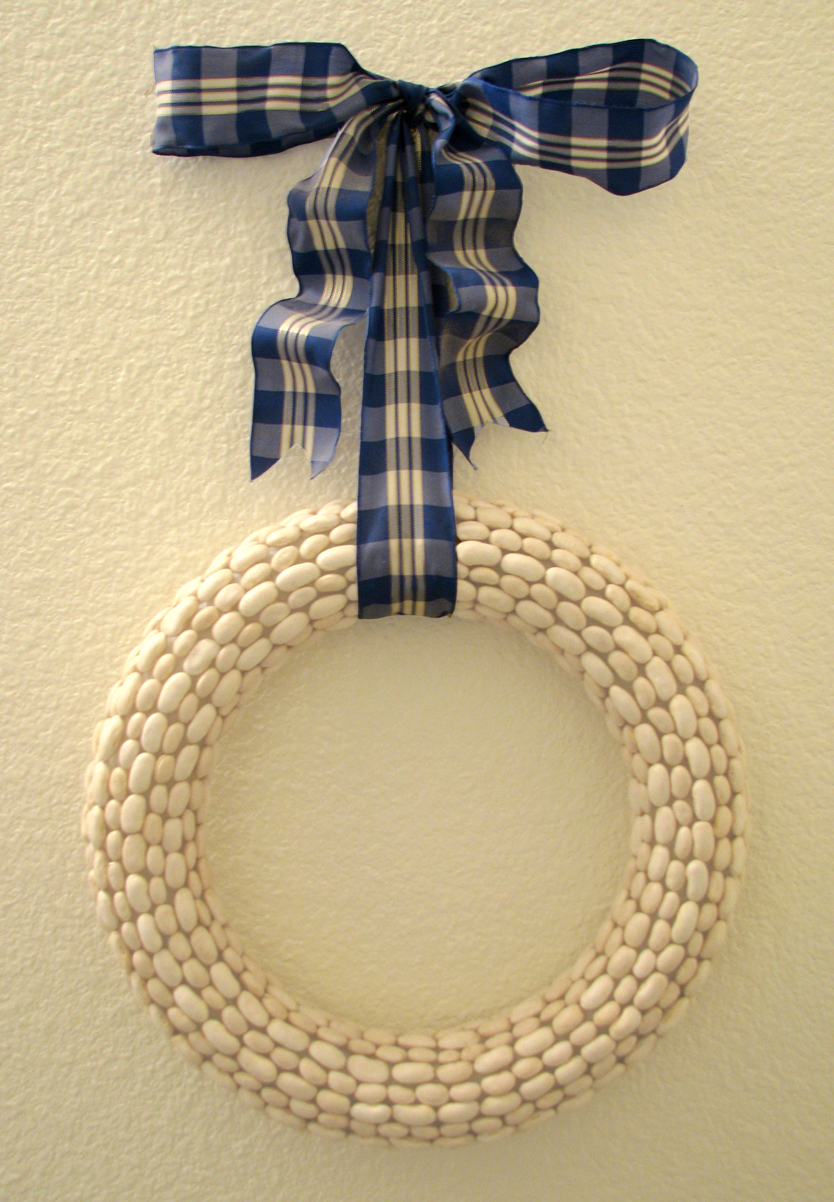
Before giving an update on my projects I want to show you something I made about 15 years ago that I still love and display in my home.


I made it out of a 10" styrofoam wreath form, two sizes of white beans and blue, wired ribbon.  I used tacky glue to hold the beans on the form and it took hours to make because the beans kept sliding off the wreath.  If I ever make another one I'll probably use hot glue.

Now on to my project update.  The first finished item is the coffee filter wreath for my daughter.  You might remember that I already showed the wreath form and the coffee filters here.


My daughter asked if I would paint the edges of the filters pink.  That way it would look like a carnation and also fit in with her decor.


They turned out real pretty, don't you think?


I'm not sure how she wants it to hang so I haven't added ribbon.  Originally I expected the filters to meet in the middle since this is a small wreath form.  That didn't happen, but I still think it looks a lot like a carnation.  It is different from my brown coffee filter wreath shown here.

I'm still working on my 'Fresh Eggs' sign.  Here it is in process:


More on that in another post.

I hope you have a wonderful rest of your Thursday!

Cindy

Linking to:

The Shabby Nest's Frugal Friday
The Shabby Nest

Tuesday, November 16, 2010

Not Just Another Coffee Filter Wreath Tutorial


There are so many great tutorials out there in blogland showing how to make a coffee filter wreath so I didn’t want to do another.  My favorites are at Dearest Home, On Ruby Lane’s using a rubber stamp on the filters, oo-la-la and Manuela at The Pleasures of Homemaking.  Manuela made a square wreath that I just love.

Instead of showing how to make the wreath, I decided to give some tips for making the project much easier to do. 


Tip #1 - I bought a package of 200 brown coffee filters ($1.29 at HEB in Austin) and used them all.  Some of them didn’t separate easily so I separated a bowlful before beginning to hot glue them to the wreath form.  When the bowl was empty, I just filled it again.  This saved a lot of time that separating one and gluing, separating another and gluing, etc. would have taken.


Tip #2 – Anyone who has used a hot glue gun knows about hot glue burns.  Whenever I use my glue gun, I always, always have a bowl of ice water nearby in which to dip my poor burned body part after touching the hot glue. 


Tip #3 – Tip #2 doesn’t help me avoid burns, it only helps when I get one.  After burning myself two times in the same place, I decided to use the end of a spoon to hold the hot glue-drenched coffee filter down to protect my fingers.  You can see how I did it here:


I borrowed Erin’s idea at It’s a Wannabe Decorator’s Life of using jute upholstery webbing in the place of ribbon. 


I love how the brown coffee filters that all look alike come alive when made into the wreath and the light casts shadows all over.  Isn’t it pretty? 

I hope some of my tips help save other burned fingers.

Cindy

I've linked to the following:

My Uncommon Slice of Suburbia Tuesday's Treasures
Photobucket
Tip Junkie's Tip Me Tuesday
all crafts Handmade Projects ~ Tip Me Tuesday
Lucky Star Lane's Lucky Linky Tuesday
BWS tips button
Nikki's Nifty Knacks Gettin' Crafty on Hump Day

Blue Cricket Design's Show and Tell